Beginners Guide to Installing a Cold Air Intake
Welcome to our guide on installing a cold air intake. It’s a great DIY project for car lovers in the United States. This upgrade can make your car run better and use less fuel. You’ll learn how to boost your car’s power and quickness with this guide.
We aim to make installing a cold air intake easy for you. Our step-by-step guide will help you do it yourself. You’ll see better engine performance and a more efficient fuel system.
Introduction to Cold Air Intake Installation
Installing a cold air intake is simple and can be done with basic tools and knowledge. Our guide will show you how to do it, from start to finish. You’ll enjoy the performance boost it brings.
Key Takeaways
- Installing a cold air intake can improve your vehicle’s performance and fuel efficiency
- A cold air intake DIY is a relatively simple process that can be completed with basic tools and knowledge
- Our guide provides step-by-step instructions for installing a cold air intake
- A cold air intake can enhance your vehicle’s overall power and responsiveness
- With our guide, you’ll learn how to install a cold air intake and enjoy the benefits of this performance upgrade
- A cold air intake DIY is a great way to upgrade your vehicle and improve its performance
- Our guide is designed to help you complete this DIY project with ease and confidence
Understanding Cold Air Intake Systems
Cold air intake systems boost engine performance by using cooler, denser air. They draw air from outside the engine, not the warmer air inside. This can increase horsepower and torque, making them a favorite engine upgrade among car lovers.
For engine upgrades, cold air intakes are a simple, affordable choice. They cool the air entering the engine, improving combustion. This leads to better fuel efficiency and a bit more power.
What is a Cold Air Intake?
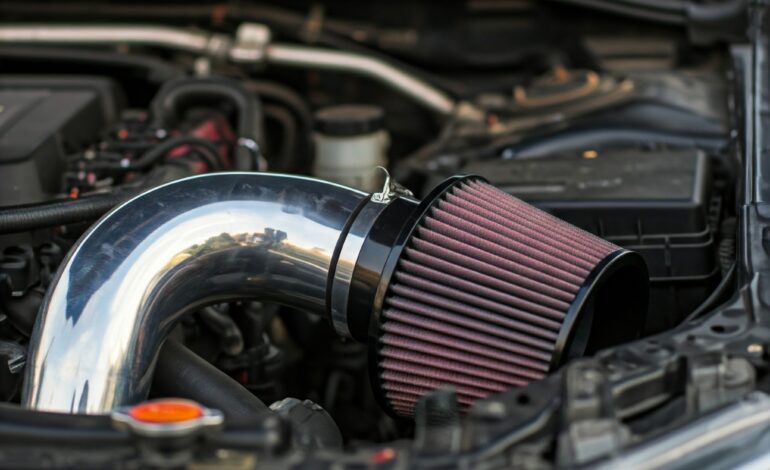
A cold air intake replaces the stock air intake system. It allows for a direct flow of cold air into the engine. This can be done with a cold air intake kit or a short ram intake.
How Cold Air Intakes Improve Performance
Cold air intakes enhance performance by using cooler, denser air. This leads to more efficient combustion. This can improve fuel efficiency and slightly boost power.
Types of Cold Air Intake Systems
There are many cold air intake systems, like short ram intakes, cold air intake kits, and ram air intakes. Each has its own benefits. The best choice depends on the driver’s needs and goals.
- Short ram intakes: These are compact and easy to install. They’re perfect for a simple engine upgrade.
- Cold air intake kits: These kits include a cold air intake, a mass airflow sensor, and more. They’re for a complete installation.
- Ram air intakes: These take advantage of the ram air effect. They can significantly boost power at high speeds.
Understanding the different cold air intake systems helps drivers choose the right engine upgrade for their vehicle.
Benefits of Installing a Cold Air Intake
Installing a cold air intake is a top choice for car enthusiasts. It boosts your car’s performance in many ways. Increased horsepower is a key benefit. It lets your engine take in cooler air, making it more powerful.
Another plus is better fuel efficiency. Cool air helps your engine burn fuel better, saving gas. This is great for long drives, as it cuts down on fuel costs.
Some main advantages of a cold air intake system are:
- Increased horsepower and torque
- Improved fuel efficiency
- Enhanced engine sound
- Easy installation
A cold air intake also adds a unique sound and style to your car. There are many mods to choose from, matching your car and taste. It’s a smart pick for better performance, fuel savings, or a cool look.
Required Tools and Materials
Before starting your cold air intake DIY project, gather all the necessary tools and materials. This will save you time and prevent damage to your vehicle. A DIY cold air intake installation can be fun and rewarding if you plan well.
You’ll need a socket set, wrenches, and pliers to get started. It’s also important to have a clean and well-lit workspace to avoid accidents. Make sure you have the cold air intake kit, hoses, and clamps ready.
Essential Tools Checklist
- Socket set
- Wrenches (adjustable and fixed)
- Pliers (needle-nose and slip-joint)
- Screwdrivers (flathead and Phillips)
Safety Equipment Needed
Wear proper safety equipment when working with power tools and electrical systems. This includes gloves, safety glasses, and a face mask. They protect you from cuts, scratches, and electrical shocks.
Recommended Spare Parts
Keep some spare parts handy, like extra hoses, clamps, and gaskets. This ensures you can finish the installation without delays. By following this checklist and taking precautions, you’ll have a successful DIY cold air intake installation.
Preparing Your Vehicle for Installation
Before you start installing a cold air intake system, it’s essential to prepare your vehicle. This means checking the engine and its components to make sure they’re in good shape. Proper preparation is key for a smooth installation and to avoid damage to your vehicle. When it comes to car mods, getting ready is essential for a successful upgrade.
To get your vehicle ready, you’ll need to check the air filter, engine oil, and other important parts. Here’s a simple guide to follow:
- Check the air filter and replace it if necessary
- Check the engine oil level and top it off if needed
- Inspect the engine and its components for any signs of damage or wear
By following these steps, you can make sure your vehicle is ready for the cold air intake system. This will help you avoid problems and ensure the upgrade goes well. Car mods can really boost your vehicle’s performance, but they need careful planning and preparation.
Preparing your vehicle for installation is a critical step in the process. It’s essential to take the time to check the engine and its components to ensure they are in good condition. This will help you to avoid any problems and ensure the upgrade is successful.
Removing the Factory Air Intake System
Removing the factory air intake system is a key step in engine upgrades. It’s important to be careful and safe to avoid damage. First, disconnect the battery to prevent engine starts or electrical shocks.
Start by finding the factory air intake system. Look for the air filter, mass airflow sensor, and intake duct. Note the connectors and hoses to disconnect them later.
Disconnecting Battery Safety
Disconnecting the battery is a safety step. It stops accidental engine starts or electrical shocks. Follow the right steps to disconnect the battery safely.
Removing Stock Components
After disconnecting the battery, remove the stock parts. Loosen clamps or screws holding the air intake system. Carefully pull the parts away from the engine.
Preserving Original Parts
Keep the original parts for future use. Label and store each component safely. Make sure to clean and check any parts to be reused.
By following these steps, you can safely remove the factory air intake system. This prepares your engine for a new cold air intake system. Handle each part with care and take your time for a successful removal.
| Component | Location | Removal Procedure |
|---|---|---|
| Air Filter | Engine Compartment | Loosen clamps and pull away from engine |
| Mass Airflow Sensor | Intake Duct | Disconnect electrical connector and pull away from engine |
| Intake Duct | Engine Compartment | Loosen clamps and pull away from engine |
Cold Air Intake Installation Process
Installing a cold air intake is a great way to boost your car’s performance. First, unpack the new system and get your car ready. This means removing the old air intake system, as we talked about before.
Then, find the mass airflow sensor and disconnect it from the old intake. You’ll need to connect this sensor to the new cold air intake. Be careful not to damage the sensor or the surrounding components. If you’re unsure, it’s best to ask a professional mechanic or a trusted car mods expert.
Here are the general steps to follow:
- Mount the new air intake system in the engine compartment
- Connect the mass airflow sensor to the new system
- Install the new air filter and intake tube
- Secure all connections and ensure a proper seal
A well-installed cold air intake can make your car run better and use less fuel. Always follow the manufacturer’s instructions and take safety precautions. This way, you avoid damaging your car or getting hurt.
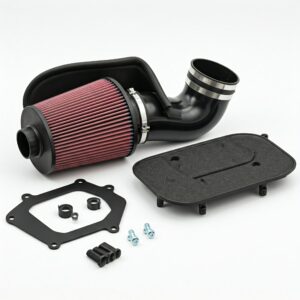
Cold air intake installation is a relatively straightforward process, but it does require some technical knowledge and mechanical skills. If you are not confident in your abilities, consider seeking the help of a professional mechanic or a trusted car mods expert.
Common Installation Challenges and Solutions
Working on a cold air intake DIY project can be tricky. You might face challenges during installation. Knowing common problems and their fixes can save you time and stress.
Fitment issues, sensor problems, and weather can be big hurdles. For example, a cold air intake might not fit right in the engine compartment. You might need to make adjustments for a good fit.
Fitment Issues
Measuring the engine compartment and the intake system is key. This helps spot any fitment problems early. Reading the manufacturer’s instructions and seeking advice from forums or experts can also help.
Sensor Integration Problems
Connecting the intake system to the engine control unit can be tricky. Make sure all sensors are connected and calibrated right. Also, check if the system fits your vehicle’s make and model.
Weather Considerations
Weather can affect your installation. Install in a dry, well-ventilated area. Use protective coverings to shield from extreme weather.
Knowing these common challenges and how to solve them can make your DIY installation smooth. You’ll enjoy better engine performance and efficiency.
Maintenance and Care Tips
Keeping your car mods in top shape is key. This includes the cold air intake system. Regular cleaning and checks prevent damage and keep things running smoothly. It’s smart to clean the air filter every 15,000 to 30,000 miles, based on how you drive.
Car mods can really change how your vehicle performs. Regular tune-ups and checks spot problems early. Also, well-maintained mods can make your car more fuel-efficient and fun to drive.

Here are some tips to keep your cold air intake system in great shape:
- Check the air filter regularly and replace it as needed
- Inspect the system for any signs of damage or wear
- Keep the system clean and free of debris
By following these tips, you’ll get the most out of your car mods. Enjoy better performance and fuel efficiency for a long time.
Conclusion: Enjoying Your Performance Upgrade
Now that you’ve installed your new cold air intake, it’s time to enjoy the benefits. You’ll see better acceleration, fuel efficiency, and a more responsive ride. This DIY project has unlocked new levels of performance for your vehicle.
As you drive, notice the increased power and responsiveness. The cold air intake optimizes airflow, letting your engine breathe better. This gives you a surge of torque and horsepower. You’ll also hear a satisfying sound as cool air flows into your engine.
This DIY project has also taught you more about your vehicle. You learned how to remove the factory air intake and set up the new one. This experience has given you valuable knowledge and problem-solving skills for future upgrades.
Enjoy driving your vehicle more than ever. The enhanced performance is a reward for your hard work. Let the open road be your canvas to explore your engine’s full capabilities.

