How to Repair a Cracked Radiator on a Budget
A cracked radiator poses a significant threat to your vehicle’s cooling system. If not fixed, it can cause more damage and lead to expensive repairs. Fortunately, you can repair a radiator on a budget with the right steps. This guide will show you how to do it yourself, focusing on cost-effective solutions.
Fixing a cracked radiator promptly can prevent damage to your engine and cooling system. This can save you from costly repairs later on. With the right tools and materials, you can successfully repair your radiator on a budget. We’ll guide you through the process.
Key Takeaways
- Addressing a cracked radiator promptly is critical to prevent further damage to your vehicle’s cooling system.
- Radiator repair can be done on a budget with the right approach and materials.
- A DIY radiator repair can save you money compared to taking it to a professional mechanic.
- Basic mechanical skills are all you need to perform a successful radiator repair.
- A budget repair can be just as effective as a professional repair if done correctly.
- Regular maintenance can help prevent radiator damage and the need for repairs.
- With the right guidance, you can perform a radiator repair on your own and save money in the process.
Understanding Your Radiator System
To tackle a radiator crack effectively, grasping the basics of your radiator system is key. This knowledge aids in diagnosing and fixing the problem, potentially saving you from costly cooling system repairs. Radiators play a vital role in your vehicle’s cooling system, tasked with removing heat from the engine.
Diverse radiator types exist, including copper, aluminum, and plastic. Each has unique characteristics, benefits, and drawbacks. For example, copper radiators excel in heat transfer, whereas aluminum radiators are lighter and more resistant to corrosion. Knowing your radiator’s type can enhance your understanding of its operation and repair needs.
Common Types of Radiators
- Copper radiators: known for their excellent heat transfer properties
- Aluminum radiators: lighter and more corrosion-resistant
- Plastic radiators: often used in modern vehicles due to their lightweight and cost-effectiveness
How Radiators Function
Radiators work by circulating coolant through the engine, absorbing heat, and then releasing it through their surface. This process maintains the engine’s temperature, preventing overheating and engine damage. A crack in the radiator can hinder this process, leading to reduced performance and engine damage.
Signs of Radiator Damage
Recognizing radiator damage signs is critical for timely repair and to prevent further issues. Common indicators include leaks, overheating, and decreased engine performance. If you spot these symptoms, addressing them promptly is essential to avoid expensive cooling system repairs. Understanding your radiator system and recognizing damage signs enables proactive maintenance, preventing future cooling system problems.
| Signs of Radiator Damage | Description |
|---|---|
| Leaks | Visible signs of coolant leakage around the radiator or hoses |
| Overheating | Engine temperature gauge rising above normal levels |
| Decreased Engine Performance | Reduced engine power, rough idling, or stalling |
Safety Precautions Before Starting
Ensuring Radiator Repair safety is critical to avoid hazards. Protective gear like gloves, safety glasses, and a face mask is mandatory. Also, proper ventilation is key to prevent inhaling harmful fumes.
To create a safe workspace, follow these guidelines:
- Wear protective gear to prevent skin and eye irritation
- Ensure proper ventilation to prevent inhalation of harmful fumes
- Handle potentially hazardous materials like coolant with care
Be mindful of risks like coolant spills and electrical shocks during Radiator Repair. By taking safety measures, you can reduce these risks and achieve a safe, successful repair.
Remember, safety should always be your primary concern in Radiator Repair. By adhering to these guidelines and precautions, you can ensure a safe and effective repair.
| Safety Precaution | Importance |
|---|---|
| Wearing protective gear | High |
| Proper ventilation | High |
| Handling hazardous materials with care | High |
Essential Tools and Materials for Budget Radiator Repair
When tackling a budget repair of a cracked radiator, the right tools and materials are key. A successful radiator crack repair demands a mix of essential tools, recommended products, and cost-effective supplies. It’s vital to collect all necessary items for a seamless and efficient repair.
A list of necessary tools and materials for budget radiator repair includes:
- Adjustable wrench or basin wrench
- Pliers and screwdrivers
- Radiator repair kit
- Epoxy sealant or stop-leak product
- Plastic welding kit (optional)
Choosing the right repair products is critical for radiator crack repair. Opt for products tailored for radiator repair, like epoxy-based sealants or stop-leak products. These can create a robust and lasting seal, ensuring your repair endures.
To find affordable supplies, explore local auto parts stores or online retailers. Compare prices and seek out discounts or promotions to keep your budget repair on track. With the correct tools and materials, you’re set for a successful radiator crack repair.
| Tool/Material | Cost | Availability |
|---|---|---|
| Adjustable wrench | $10-$20 | Auto parts stores |
| Radiator repair kit | $20-$50 | Online retailers |
| Epoxy sealant | $5-$10 | Hardware stores |
Locating the Radiator Crack
To successfully repair a cracked radiator, identifying the radiator crack location is key. This task can be tricky, but with the right strategy, you can pinpoint the leak or crack. Begin by visually inspecting the radiator for damage signs like rust, corrosion, or water spots.
A pressure test can also aid in finding the radiator crack location. This involves pressurizing the radiator and then checking for leaks or pressure drops. Utilizing a pressure test kit can simplify and enhance the accuracy of this process.
- Drain the radiator and remove any debris or sediment
- Pressurize the radiator using a pressure test kit
- Check for any leaks or drops in pressure
- Use a leak-down test to pinpoint the radiator crack location
By adhering to these steps and employing the correct tools, you can accurately locate the radiator crack location. This allows you to start the repair process effectively.
| Method | Description |
|---|---|
| Visual Inspection | Check for signs of damage, such as rust or corrosion |
| Pressure Test | Pressurize the radiator and check for leaks or drops in pressure |
Professional Radiator Repair vs DIY Costs
Repairing a cracked radiator involves a significant cost consideration. Budget repair options are available, but it’s vital to compare the costs of professional repair to DIY. Professional radiator repair can be pricey, with costs between $500 to $1,500. This depends on the damage’s severity and the radiator type.
DIY repair, on the other hand, offers a more affordable path, with costs from $50 to $500. This depends on the materials and tools required. Yet, it’s important to consider the long-term savings of DIY. Repairing the radiator yourself can save on labor costs, a major part of the total expense.
When deciding between professional and DIY radiator repair, several factors are key:
- Average professional repair expenses: $500 to $1,500
- DIY repair costs: $50 to $500
- Potential long-term savings: 50% to 75% of professional repair costs
Choosing DIY and opting forbudget repair can save oncooling system repair costs. It ensures your radiator works efficiently.
Step-by-Step Radiator Repair Methods
Exploring radiator crack repair methods reveals several viable options. The aim is to identify a method that balances effectiveness, efficiency, and affordability. This section delves into three prevalent radiator repair techniques: epoxy sealants, stop-leak products, and plastic welding.
Using Epoxy Sealants
Epoxy sealants are favored for their simplicity and robust bonding capabilities. To apply them, first clean the crack area. Then, apply the sealant and wait for it to dry, following the manufacturer’s guidelines.
Applying Stop-Leak Products
Stop-leak products are another effective solution. They seal cracks from the inside, preventing leaks and further damage. Simply pour the product into the radiator and allow it to circulate through the system.
Plastic Welding Techniques
Plastic welding is a more complex method requiring specialized tools and skills. It involves using a plastic welder to melt and fuse the plastic, creating a strong bond. Though it’s pricier and more time-consuming, it offers a durable fix for radiator cracks.
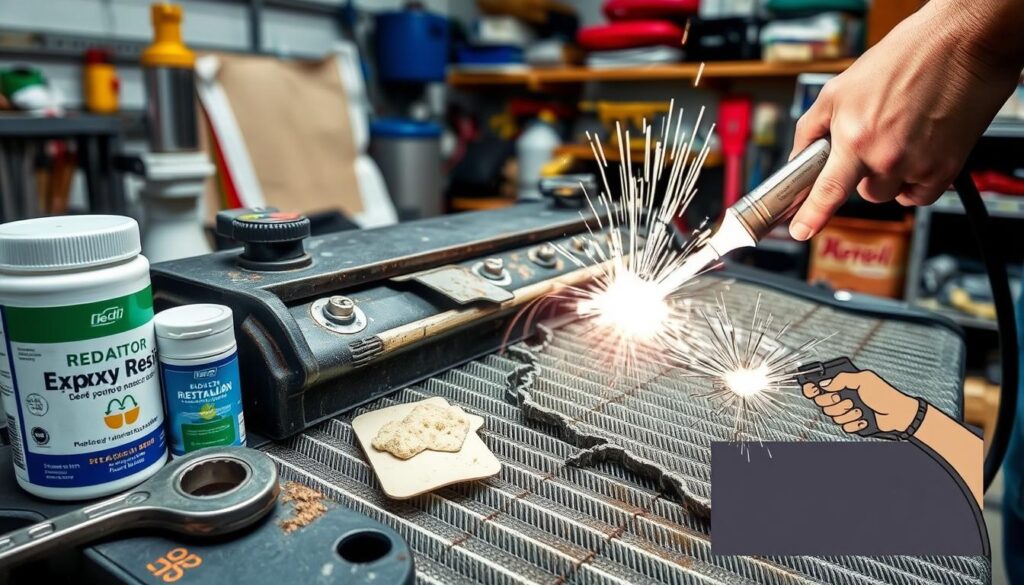
Considering these methods can help you choose the best option for your needs and budget. Always prioritize safety and adhere to the manufacturer’s instructions when attempting any repair.
Testing Your Repair Work
After finishing a radiator repair, it’s vital to test the work to confirm its success and absence of leaks. This is where radiator repair testing plays a critical role. It involves a series of steps to ensure the radiator operates as it should.
Key procedures for testing radiator repairs include:
- Pressure tests to detect leaks or weaknesses in the radiator
- Visual inspections for damage or wear signs
- Functional tests to verify the radiator’s cooling efficiency
By adhering to these steps, you can confirm the success of your radiator repair. This ensures your vehicle operates safely and efficiently. Always prioritize safety during radiator repair testing. If unsure, seek professional assistance.
Regular radiator repair testing can prevent expensive repairs and keep your vehicle in top condition.
Common Mistakes to Avoid
Understanding common radiator repair mistakes can save you time, money, and frustration. It’s critical to avoid errors that can lead to further damage or compromise the radiator system’s integrity. This knowledge is key to a successful repair.
Common mistakes include selecting the wrong products, applying repair materials incorrectly, and overlooking testing steps. These errors can be prevented by understanding the repair process, choosing the right materials, and following a detailed testing protocol.
Product Selection Errors
Choosing the wrong products for your radiator repair can cause a variety of problems. These range from ineffective repairs to further damage to the system. It’s vital to select products that are compatible with your radiator type and the damage’s nature.
Application Mistakes
Incorrect application of repair materials is another common mistake. It can lead to compromised repair success. This includes using too much or too little product, applying it to the wrong area, or not following the manufacturer’s instructions.
Testing Oversights
Failing to thoroughly test your radiator repair can lead to common mistakes. These include leaks or other issues that can cause the system to fail. It’s essential to follow a detailed testing protocol. This includes checking for leaks, testing the system under pressure, and monitoring its performance over time.
By being aware of these common radiator repair mistakes and taking steps to avoid them, you can ensure a successful repair. This will get your radiator system back up and running efficiently.
| Mistake | Consequence | Prevention |
|---|---|---|
| Product Selection Errors | Ineffective repairs or further damage | Choose compatible products |
| Application Mistakes | Compromised repair success | Follow manufacturer’s instructions |
| Testing Oversights | Leaks or system failure | Follow a detailed testing protocol |
When DIY Isn’t Enough: Knowing When to Seek Professional Help
While DIY can save money and be fulfilling, there are times when professional radiator repair is necessary. It’s vital to know when a repair job is too complex for you to handle.
Signs that you might need professional radiator repair include:
- Extensive damage to the radiator or surrounding components
- Leaks that cannot be easily located or repaired
- Complex repairs that require specialized tools or expertise
When faced with such situations, finding a reliable, experienced professional is key. Ask friends, family, or check online reviews for a trustworthy professional radiator repair service.
While DIY can be cost-effective, improper repairs can lead to bigger issues. Recognizing when to seek professional radiator repair ensures your radiator is fixed right. This saves you time and money in the long run.
A professional radiator repair service can provide you with the expertise and equipment needed to fix your radiator quickly and effectively, giving you peace of mind and ensuring your vehicle is safe to drive.
Being aware of your limits and knowing when to seek professional radiator repair helps you make better decisions. This approach can extend your vehicle’s lifespan.
Preventing Future Radiator Damage
To extend your radiator’s life and your vehicle’s cooling system, prioritize radiator maintenance. Regular checks and maintenance can spot issues early, preventing major damage to your radiator.
Simple maintenance tips can greatly reduce radiator damage risk. Key tips include:
- Regularly inspecting the radiator for signs of leaks or corrosion
- Checking the coolant level and condition
- Flushing the cooling system periodically
Being alert to warning signs, like unusual noises, leaks, or overheating, can help address issues early. Following seasonal care guidelines, such as checking coolant during winter, prepares your radiator for extreme temperatures.
Proactive radiator maintenance and awareness of issues can prevent damage. Regular maintenance extends your radiator’s life and keeps your vehicle’s cooling system running smoothly.
Conclusion: Making Smart Choices for Your Radiator Repair
Repairing a cracked radiator on a budget is achievable with the right strategy. Understanding your radiator system, taking safety precautions, and using affordable tools and materials can save you a lot. This approach is much cheaper than hiring professionals.
When dealing with radiator repair, making informed decisions is key. Assess the damage carefully, consider DIY options, and seek professional help if needed. The savings and peace of mind are worth the effort.
Whether you decide to repair the radiator yourself or hire a professional, focus on safety, quality, and your vehicle’s performance. With the correct approach, you can maintain your radiator’s condition. This ensures a smooth and worry-free driving experience.
FAQ
What are the common types of radiators?
How do I know if my radiator is damaged?
What safety precautions should I take before starting a radiator repair?
What are the essential tools and materials needed for a budget-friendly radiator repair?
How do I locate the specific crack or leak in my radiator?
How do the costs of professional radiator repair compare to a DIY approach?
FAQ
What are the common types of radiators?
Common radiator types include aluminum, copper-brass, and plastic/aluminum hybrids. Each offers unique benefits and considerations for repair and replacement.
How do I know if my radiator is damaged?
Look for cracks, leaks, engine overheating, temperature fluctuations, and coolant level drops. Addressing these signs quickly prevents further cooling system damage.
What safety precautions should I take before starting a radiator repair?
Wear gloves, goggles, and ensure good ventilation before starting. Follow proper procedures for coolant handling and disposal.
What are the essential tools and materials needed for a budget-friendly radiator repair?
You’ll need a socket set, pliers, drain pan, and pressure tester. Use epoxy, stop-leak additives, and plastic welding kits. Find these at auto parts stores or online.
How do I locate the specific crack or leak in my radiator?
First, visually inspect the radiator for damage. A pressure test can also help pinpoint the leak’s location.
How do the costs of professional radiator repair compare to a DIY approach?
Professional repairs cost 0 to
FAQ
What are the common types of radiators?
Common radiator types include aluminum, copper-brass, and plastic/aluminum hybrids. Each offers unique benefits and considerations for repair and replacement.
How do I know if my radiator is damaged?
Look for cracks, leaks, engine overheating, temperature fluctuations, and coolant level drops. Addressing these signs quickly prevents further cooling system damage.
What safety precautions should I take before starting a radiator repair?
Wear gloves, goggles, and ensure good ventilation before starting. Follow proper procedures for coolant handling and disposal.
What are the essential tools and materials needed for a budget-friendly radiator repair?
You’ll need a socket set, pliers, drain pan, and pressure tester. Use epoxy, stop-leak additives, and plastic welding kits. Find these at auto parts stores or online.
How do I locate the specific crack or leak in my radiator?
First, visually inspect the radiator for damage. A pressure test can also help pinpoint the leak’s location.
How do the costs of professional radiator repair compare to a DIY approach?
Professional repairs cost $300 to $1,000 or more. DIY repairs with affordable tools and materials can cost $50 to $200, saving you money.
What are the different radiator repair methods I can use?
You can use epoxy, stop-leak products, or plastic welding. Each method has its own benefits and requirements, so follow the instructions carefully.
How do I properly test the effectiveness of my radiator repair?
Test the repair by pressure testing, visual inspection, and monitoring temperature and coolant levels. This ensures the repair is successful.
What are some common mistakes to avoid when repairing a cracked radiator?
Avoid using the wrong products, improper application, and neglecting testing. Awareness of these mistakes can prevent costly errors and ensure a successful repair.
When should I consider seeking professional help for my radiator repair?
If the damage is extensive or you’re unsure about the repair, seek professional help. A mechanic can diagnose and fix the issue safely and effectively.
How can I prevent future radiator damage?
Regular coolant flushes, monitoring for damage signs, and following seasonal care guidelines can prevent future damage. Proactive maintenance is key to avoiding unexpected issues.
,000 or more. DIY repairs with affordable tools and materials can cost to 0, saving you money.
What are the different radiator repair methods I can use?
You can use epoxy, stop-leak products, or plastic welding. Each method has its own benefits and requirements, so follow the instructions carefully.
How do I properly test the effectiveness of my radiator repair?
Test the repair by pressure testing, visual inspection, and monitoring temperature and coolant levels. This ensures the repair is successful.
What are some common mistakes to avoid when repairing a cracked radiator?
Avoid using the wrong products, improper application, and neglecting testing. Awareness of these mistakes can prevent costly errors and ensure a successful repair.
When should I consider seeking professional help for my radiator repair?
If the damage is extensive or you’re unsure about the repair, seek professional help. A mechanic can diagnose and fix the issue safely and effectively.
How can I prevent future radiator damage?
Regular coolant flushes, monitoring for damage signs, and following seasonal care guidelines can prevent future damage. Proactive maintenance is key to avoiding unexpected issues.

