Troubleshooting a Dead Alternator: Replacement Made Easy
A dead alternator can leave you stranded, and ignoring alternator issues can lead to car battery damage and other electrical system problems. A functioning alternator is vital for your vehicle’s health. Replacing a dead one is simpler than you might think. With the right guidance, you can troubleshoot and replace your alternator, getting back on the road quickly.
Alternator issues can be frustrating, but understanding the replacement process can make all the difference. Whether you’re dealing with a dead alternator or car battery problems, it’s essential to address the issue promptly to avoid further damage. In this article, we’ll guide you through troubleshooting and replacing a dead alternator. This will make it easy for you to get back on the road.
Key Takeaways
- A dead alternator can cause car battery damage and other electrical system problems
- Replacing a dead alternator is easier than you think with the right guidance
- Alternator issues can be frustrating, but understanding the replacement process can make all the difference
- Addressing alternator issues promptly can help avoid further damage
- Troubleshooting and replacing a dead alternator can be done with basic tools and knowledge
- Regular maintenance can help extend the life of your alternator and car battery
Signs of a Failing Alternator
A failing alternator can show several signs, indicating its condition. Understanding the alternator’s role in your vehicle’s electrical system is key. It charges the battery and powers the electrical system, including lights, radio, and accessories.
Common signs include dimming or flickering lights, caused by a malfunctioning alternator. Another sign is the battery warning light illumination, showing a problem with charging the battery.
Dimming or Flickering Lights
This indicates a failing alternator, unable to provide stable voltage. Other signs include strange noises from the engine bay, possibly from a malfunctioning alternator belt or pulley.
Battery Warning Light Illumination
This suggests a problem with charging the battery. If you notice these signs, it’s vital to have a professional mechanic check your alternator. They can diagnose the issue and recommend repairs.
Other signs include electrical system issues, like a dead battery or malfunctioning accessories. Addressing alternator issues promptly is essential. Regular checks of your vehicle’s electrical system are also critical.
| Signs of a Failing Alternator | Description |
|---|---|
| Dimming or Flickering Lights | Malfunctioning alternator causing unstable voltage output |
| Battery Warning Light Illumination | Alternator not charging the battery properly |
| Strange Noises from Engine Bay | Malfunctioning alternator belt or pulley |
| Electrical System Issues | Dead battery or malfunctioning accessories |
Recognizing these signs allows you to address the issue early. This prevents further damage to your vehicle’s electrical system.
Understanding Your Car’s Charging System
The car’s charging system is a complex network that includes the alternator, car battery, and electrical system. To grasp its functionality, we must examine its main components. The alternator is key, converting mechanical energy into electrical energy. This energy is then used to charge the battery and power the car’s electrical systems.
A healthy car battery is vital for the system’s operation. It stores energy from the alternator and supplies power to the electrical system when the engine is off. The electrical system encompasses various components like lights, radios, and wipers. These all depend on the charging system for their operation.
Here are some key points to consider when it comes to the car’s charging system:
- The alternator is responsible for charging the car battery and powering the electrical system.
- A healthy car battery is essential for the proper functioning of the charging system.
- The electrical system includes various components that rely on the charging system for power.
Understanding the car’s charging system highlights the need for proper maintenance and repair. Regular inspections of the alternator, car battery, and electrical system can prevent issues. This ensures your car operates efficiently.
Essential Tools for Alternator Replacement
Replacing an alternator requires the right tools for a smooth process. This ensures your car’s electrical system, including the battery, is not damaged. A well-stocked toolkit is key to a successful alternator swap.
Begin with basic hand tools like wrenches, pliers, and screwdrivers. These are essential for disconnecting the battery and removing the old alternator. Don’t forget safety gear like gloves and safety glasses to protect against electrical shocks or debris.
Basic Hand Tools Required
- Wrenches (adjustable and fixed)
- Pliers (needle-nose and slip-joint)
- Screwdrivers (flathead and Phillips)
Safety Equipment Needed
- Gloves (insulated and protective)
- Safety glasses
- Work light (for visibility in tight spaces)
Optional specialized tools can also be helpful. A multimeter, for instance, allows you to check the alternator’s voltage and diagnose electrical system problems. With the right tools, you’ll be ready to replace the alternator and ensure your car’s battery and alternator function properly.
| Tool | Description |
|---|---|
| Wrenches | For loosening and tightening bolts and nuts |
| Pliers | For gripping and bending objects |
| Screwdrivers | For driving screws and other fasteners |
Safety Precautions Before Starting
Working with your car’s electrical system requires careful safety measures to avoid injuries or damage. Before starting the alternator replacement, disconnect the battery to prevent accidental starts or electrical shocks. This step is vital for a safe working environment and injury prevention.
Protective gear, such as gloves and safety glasses, is essential when handling electrical systems. It guards against electrical shocks or flying debris. Also, ensure your workspace is well-ventilated and free from flammable materials.
Here are some key safety precautions to keep in mind:
- Disconnect the battery before starting work
- Wear protective gear, including gloves and safety glasses
- Ensure a well-ventilated working area
- Avoid wearing loose clothing that could get caught in moving parts
By adhering to these safety guidelines, you can ensure a safe and successful alternator replacement. Always prioritize your safety when working with electrical systems. If unsure about any part of the process, don’t hesitate to seek professional help.
Remember, safety precautions are not just for your safety but also to protect your car’s electrical system. By taking the necessary precautions, you can prevent costly repairs and keep your car in optimal condition.
| Safety Precaution | Importance |
|---|---|
| Disconnecting the battery | High |
| Wearing protective gear | High |
| Ensuring a well-ventilated working area | Medium |
How to Test Your Alternator
Testing your alternator requires a clear, step-by-step guide to ensure accuracy. The alternator is critical to your vehicle’s electrical system. Any malfunction can lead to significant issues. You’ll need a multimeter, a standard tool for this task.
Using a Multimeter
A multimeter is essential for measuring your alternator’s voltage output. Set it to DC volts and connect the leads to the battery terminals. With the engine running, the voltage should be around 13.5-14.5 volts. A reading below this suggests a problem with the alternator or electrical system.
Professional Diagnostic Methods
Professional mechanics employ advanced tools for diagnosing alternator issues. They might use scan tools to read trouble codes from the vehicle’s computer. A load test is also used to assess the alternator’s performance under heavy electrical load.
Common Test Results Explained
Alternator testing can yield various results. A significantly lower voltage reading than expected may indicate a faulty alternator or electrical system issue. If the voltage is higher than expected, it could point to a voltage regulator problem. Understanding these results is key to diagnosing and resolving alternator issues.
| Test Result | Possible Cause |
|---|---|
| Low Voltage | Faulty Alternator or Electrical System |
| High Voltage | Problem with Voltage Regulator |
Alternator Replacement Step-by-Step Guide
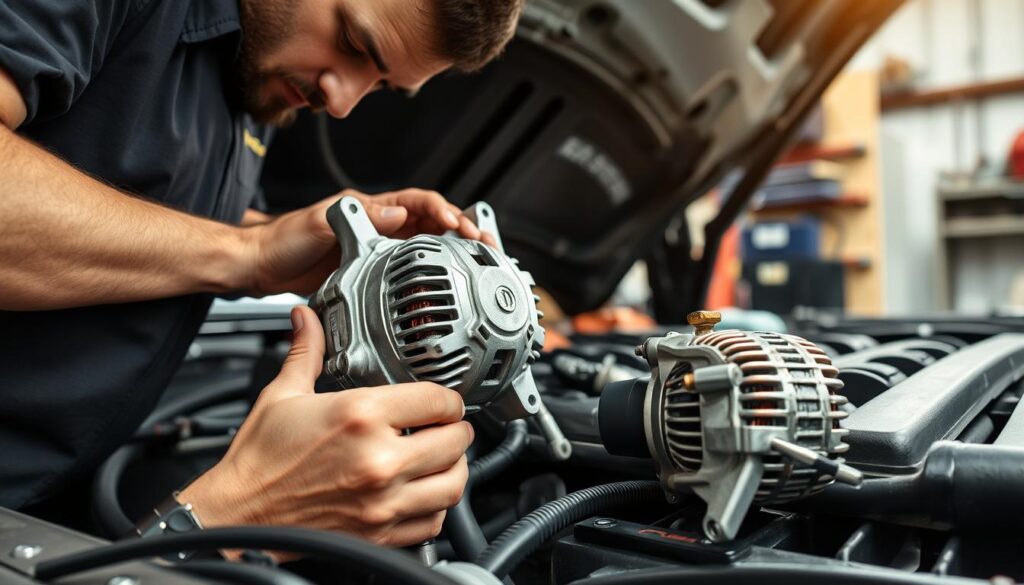
When tackling alternator replacement, a step-by-step guide is vital for success. This guide covers locating the alternator, removing the old unit, and installing the new one. It also includes adjusting the belt tension. A well-functioning alternator is key for charging your car battery and powering your vehicle’s electrical systems.
To start, find your alternator in the engine compartment. After locating it, remove the old unit. Be sure to disconnect electrical connections and remove any mounting brackets. Then, install the new alternator, ensuring it’s securely attached and connected to the electrical system.
Key Steps for Alternator Replacement
- Locate the alternator in the engine compartment
- Remove the old alternator, disconnecting electrical connections and mounting brackets
- Install the new alternator, securing it and connecting to the electrical system
- Adjust the belt tension to ensure proper alternator function
By following these steps and taking the necessary precautions, you can ensure a successful alternator replacement. This will get you back on the road with a reliable electrical system, including a healthy car battery.
Common Mistakes to Avoid During Installation
When tackling alternator installation, several common errors can occur. These errors can disrupt the electrical system and potentially harm other parts. It’s vital to recognize these pitfalls to guarantee a successful installation.
Common mistakes include incorrect wiring, loose connections, and improper belt tension. To sidestep these issues, meticulously review the wiring diagram and confirm all connections are tight. Also, it’s critical to set the belt tension correctly to safeguard the alternator and other components.
- Incorrect wiring: Verify the wiring diagram to ensure correct connections
- Loose connections: Secure all connections to prevent electrical system issues
- Improper belt tension: Adjust the belt tension correctly to prevent damage to the alternator and other components
By understanding these common mistakes and taking preventive measures, you can ensure a successful alternator installation. This approach will help avoid electrical system problems and maintain your vehicle’s performance. Always adhere to the manufacturer’s guidelines and take your time during the installation process.
With meticulous planning and attention to detail, you can circumvent common errors and achieve a successful alternator installation. This will prevent electrical system issues and ensure your vehicle operates efficiently.
Cost Comparison: DIY vs Professional Replacement
When considering an alternator replacement, cost is a critical factor. The alternator replacement cost varies significantly between DIY and professional options. It’s vital to evaluate the advantages and disadvantages of each choice.
DIY replacement offers a cost-effective route, with parts priced between $50 to $200, based on your vehicle’s make and model. You save on labor costs as you handle the work yourself. In contrast, a professional replacement can range from $200 to $500, including labor.
Factors to Consider
- Parts pricing and quality
- Labor costs and expertise
- Potential hidden expenses, such as additional repairs or maintenance
The choice between DIY and professional replacement hinges on your comfort level and budget. If you’re unsure, seeking advice from a professional mechanic is wise. This approach helps you make a well-informed decision that suits your vehicle’s needs.
Post-Installation Testing
Replacing your alternator requires thorough post-installation testing to confirm its functionality. This step involves a series of checks to ensure the alternator is charging the battery and powering the electrical system. It’s a critical phase to avoid any future issues.
Initial steps include verifying the alternator’s secure connection to the battery and electrical system. Also, check the belt tension to meet the recommended standards. Testing the alternator’s voltage output is essential to confirm it falls within the acceptable range.
Initial Checks
- Verify the alternator is properly secured
- Check the connections to the battery and electrical system
- Verify the belt tension
Road Test Procedures
A road test is vital to confirm the alternator’s performance under different driving conditions. Monitor the alternator’s voltage output and look for any signs of malfunction. Testing the electrical system’s performance, like headlights, radio, and wipers, is also necessary.

By adhering to these post-installation testing procedures, you can confirm your new alternator is correctly installed and operating as expected. This approach helps prevent future problems and ensures your vehicle’s electrical system operates efficiently.
| Test | Expected Result |
|---|---|
| Voltage Output | 13.5-14.5 volts |
| Belt Tension | Within recommended specifications |
| Electrical System Performance | No signs of malfunction |
Maintaining Your New Alternator
To ensure your new alternator lasts, regular alternator maintenance is essential. This includes checking the car battery and the alternator belt for wear signs. A well-maintained alternator extends its lifespan and prevents damage to other electrical components in your vehicle.
Here are some tips for maintaining your new alternator:
- Regularly inspect the alternator belt for cracks or frays
- Check the car battery terminals for corrosion or damage
- Test the alternator output voltage to ensure it’s within the recommended range
By following these simple steps, you can extend your new alternator’s life and avoid costly repairs. Remember, a well-maintained alternator maintenance routine is key for your vehicle’s electrical system health, including the car battery.
Keeping your vehicle’s electrical system in good condition is also important. This includes avoiding extreme temperatures, not overcharging the car battery, and ensuring all electrical components are properly connected.
| Maintenance Task | Frequency |
|---|---|
| Inspect alternator belt | Every 5,000 miles |
| Check car battery terminals | Every 3,000 miles |
| Test alternator output voltage | Every 10,000 miles |
Warranty Information and Documentation
Understanding your alternator warranty is key to ensure protection against any issues. Most warranties cover parts and labor, giving you peace of mind. This protection is vital for your investment.
When buying a new alternator, it’s vital to compare manufacturer warranties. Reputable manufacturers offer detailed warranties for defects in materials and workmanship. Make sure to check the warranty’s length and any registration or maintenance requirements.
To activate your warranty, you’ll need to provide some basic information. This includes the purchase date, vehicle details, and the alternator’s serial number. Some manufacturers might ask for a registration form or online submission.
Required Paperwork
- Purchase receipt or invoice
- Vehicle registration or title
- Alternator serial number or barcode
By understanding your alternator warranty and following the registration process, you’re protected. Always review the manufacturer warranties and requirements carefully. This ensures you avoid any issues or warranty voidance.
Conclusion
Understanding how to fix a dead alternator is within reach for anyone, even those new to car maintenance. Knowing the signs of alternator failure and having the right tools are key. Following a detailed guide can save you both time and money, compared to professional services. Always prioritize your safety and take the necessary precautions during the process.
A functioning alternator is vital for a healthy electrical system, alongside a good car battery. With the knowledge from this article, you’re ready to handle alternator replacements. This will ensure your vehicle operates efficiently. Enjoy your DIY endeavors!

