How to Change Oil in a Car: Step-by-Step for Beginners
Posted by DIYCar Editorial Team Reviewed by DIYCar Editorial Team Review date Posted Topic: Oil and Basics
To change your own oil, look up the oil grade, capacity and drain-plug torque in your owner's manual, support the car on jack stands or ramps, drain the warm oil, fit a new filter and drain-plug seal, refill, check the dipstick, then take the used oil to a collection site. Skip the job if you cannot support the car safely.
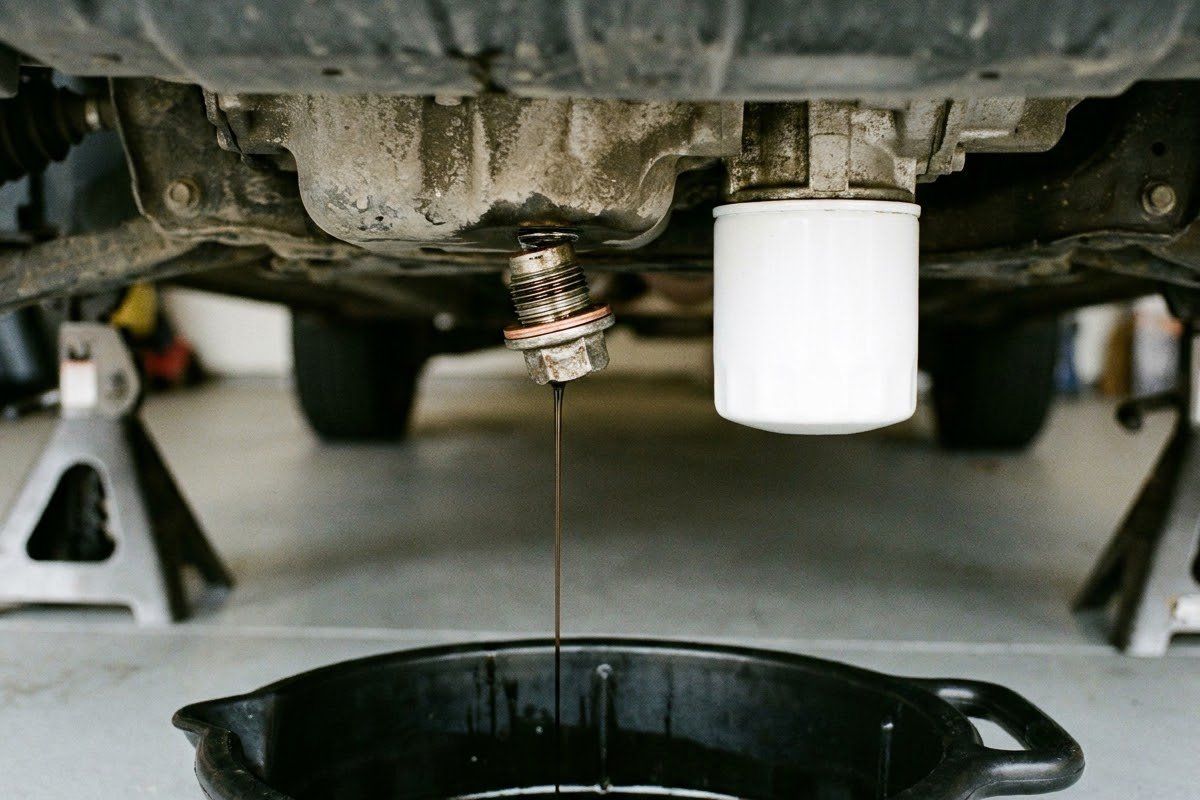
Changing your own engine oil is one of the first jobs a car owner can do at home, and it is also one of the easiest to do unsafely. This guide covers the order of the job, the safety steps that come first, and where to stop and use a shop. It is for gasoline cars; a diesel engine differs, so follow your manual. Interval questions have their own pages: see oil change intervals, how many quarts of oil your car takes and the checks that go with an oil change for the bigger picture.
Before you start: is this job right for you?
Do this job only if you can support the car securely, find the specifications in your manual, and dispose of the old oil properly. If any of those is missing, pay a shop for this one; the cost of an oil change is small next to the cost of an injury.
Read DIY car safety: the rules before you touch anything first. The short version for this job:
- The car must be on firm, level ground and supported by jack stands or ramps, never by a jack alone. One maker’s manual says: “Do not get under a vehicle that is supported by a jack.”
- Follow your manual on whether to warm the engine first, and let it cool until you can work safely. Hot oil and a hot exhaust cause burns.
- Wear eye protection and gloves. OSHA says eye and face protection must be provided whenever necessary to protect against chemical, environmental, radiological or mechanical irritants and hazards.
- Work outdoors or with the garage fully ventilated. Never run the engine in a closed garage; CDC says never to run a car inside an attached garage, even with the door open.
Stop and use a shop if
- You cannot lift and support the car on rated stands or ramps (jacking guide).
- The drain plug or filter will not loosen without excessive force, or the threads feel damaged.
- Your manual calls for a special tool, a skid plate removal you cannot do, or software you do not have.
- The car is a hybrid or electric vehicle and the manual warns about high-voltage components near the work area.
- You find fuel, coolant or milky oil, or the engine has been losing oil quickly.
Find the right oil and filter in your owner’s manual
The oil grade, specification and capacity come from your owner’s manual, and they can differ between engines of the same model. One maker’s manual lists SAE 5W-20 for a 1.6-liter engine and SAE 0W-20 for a 2.0-liter engine in the same table, along with different capacities.
Three things to write down before you shop:
- Viscosity grade (for example 0W-20). SAE J300 is the viscosity classification; it covers viscosity limits only and does not rate oil quality. Your manual names the grade to use.
- Specification or service category. API runs a voluntary licensing program that authorizes oil marketers to use its Engine Oil Quality Marks. Your manual names the service category or specification the oil must meet (for example, one maker’s table lists API SN PLUS/SP or ILSAC GF-6 for one engine). Match your manual’s wording, not just the viscosity.
- Capacity and filter part. See how many quarts of oil you need. Look up the filter by your vehicle’s year, make and engine, and check the box matches your manual.
Using the manufacturer’s recommended grade matters beyond engine health: the Department of Energy’s fueleconomy.gov says using the recommended grade can improve mileage by 1% to 2%, and that, for example, 10W-30 in an engine designed for 5W-30 can lower it by that much.
What you need
A beginner kit is covered in the basic tool kit guide. For this job:
- New oil in the manual’s grade and amount, and a new filter
- A new drain-plug washer or seal if your manual or parts listing calls for one
- Socket or wrench that fits the drain plug, and a filter wrench that fits your filter
- A torque wrench set to the drain-plug torque in your manual
- A drain pan sized to hold the whole oil capacity, and a funnel
- Jack stands or ramps rated for the vehicle, wheel chocks, eye protection, gloves, rags
- A leak-proof container for the used oil
Step 1: Warm the engine briefly and secure the car
- Follow your manual on whether to warm the engine; if you do, switch it off and let it cool until you can work safely.
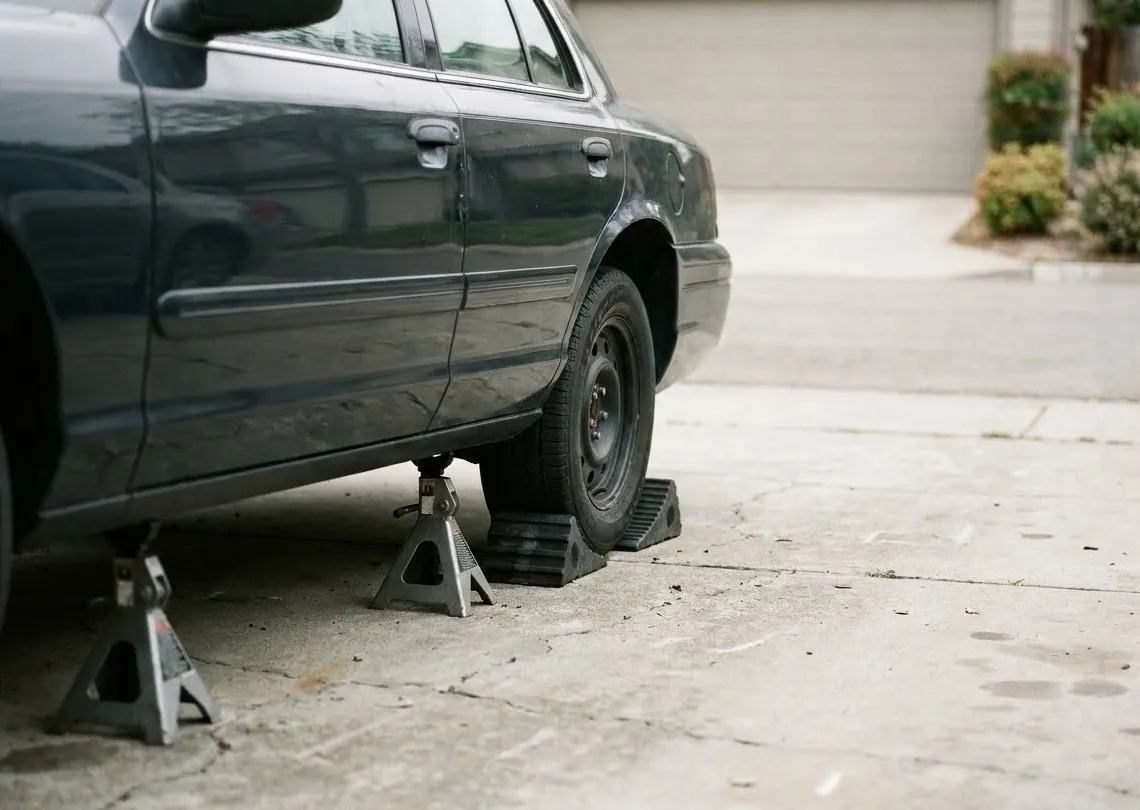
- Park on firm, level ground, set the parking brake and chock the wheels that stay on the ground (check your manual for any model-specific instruction).
- Raise the car only at the jack points your manual shows, then place stands or drive onto ramps. Test that the car is stable before going under. Follow the jacking guide.
Step 2: Drain the old oil
- Slide the drain pan under the drain plug and slightly toward the direction the oil will flow.
- Loosen the plug with the correct-size tool, then turn it out by hand at the end. Keep it away from the stream of oil.
- Let the oil drain until it slows to a drip. Take your time; oil that is still warm can burn skin.
- Clean the plug and the area around the hole. Fit the new washer or seal if your manual calls for one.
- Refit the plug and tighten it to the torque in your manual. Do not guess: an under-tightened plug leaks, and an over-tightened one can damage the threads.
Step 3: Replace the oil filter
- Move the drain pan under the filter; it holds oil that will spill.
- Loosen the old filter with the filter wrench and unscrew it. Make sure the old rubber gasket came off with it.
- Wipe the mounting surface. Wet the new filter’s gasket with a little new oil.
- Screw the new filter on and tighten it as the filter’s own instructions say. Do not use tools to over-tighten unless the instructions say to.
EPA says used oil filters should be drained and recycled as well, usually at the same collection centers as the oil.
Step 4: Refill and check the level
- Lower the car to level ground (never drop it; lower slowly with the jack, then remove the stands).
- Remove the oil filler cap and pour in oil through a funnel, a little less than the capacity at first.
- Wait a minute for it to settle, then check the dipstick (see below) and add small amounts until the level is between the marks. Do not overfill.
- Refit the filler cap, start the engine, and watch the oil pressure light go out. Look for leaks at the plug and filter.
- Switch off, wait a few minutes, and recheck the level.
Step 5: Dispose of the used oil
Let it cool, pour it into a sealed, leak-proof container, and take it to a collection site. EPA’s advice is to put used oil in a leak-proof can or container, take care not to spill any, and check with local auto maintenance facilities, waste collectors and government waste officials for when and where you can drop it off. EPA says used oil can pollute the environment if it is not recycled or disposed of properly, so do not dump it.
Reset the reminder and write it down
If your car has a maintenance reminder or oil-life monitor, your manual explains how to reset it. Whether or not it does, write down the date, mileage, oil grade and filter used. The oil change interval estimator can help plan the next one, but your manual’s schedule decides.
Mistakes to avoid
- Working under a car supported only by a jack.
- Using the oil grade from memory or from a previous car, instead of the manual.
- Forgetting to remove the old filter gasket, or fitting two gaskets.
- Overfilling, which is as unwelcome as underfilling; check the dipstick.
- Skipping the leak check after the first start.
- Dumping used oil instead of taking it to a collection site.
All Oil And Basics guides
- Basic Tool Kit for Car Maintenance: What a Beginner Needs
A beginner's tool kit for car maintenance: start with the manual and a tire gauge, then sockets, a torque wrench, stands and safety gear. Skip the rest.
- Car Maintenance Checklist: What to Check and When
A car maintenance checklist by system: what to check regularly, which jobs follow your manual's schedule, and which are safe for beginners to do.
- DIY Car Safety: The Rules Before You Touch Anything
DIY car safety rules for beginners: supporting the car, hot fluids, batteries, carbon monoxide, PPE, disposal, and when to stop and call a shop.
- How Many Quarts of Oil Does My Car Need?
How many quarts of oil your car takes is listed in the owner's manual for your exact engine. Where to find it, and how to fill and check the level.
- How Often to Change Oil: What the Manual Says and Why
How often to change oil depends on your owner's manual, your driving conditions and the oil used. See normal vs severe schedules and what to check.
- How Often to Change Synthetic Oil (and What Changes vs Conventional)
How often to change synthetic oil is set by your owner's manual, not the label on the bottle. See what the oil type changes and what it does not.
- How to Jack Up a Car Safely: Jack Points, Stands and Ramps
How to jack up a car safely: use the manual's jack points, firm level ground, then support the car on jack stands or ramps before going under.
Quick answers
How long does an oil change take?
Plan on a slow first attempt rather than a fast one. The work itself is short, but gathering the manual's specifications, safely lifting and supporting the car, letting the oil drain fully and cleaning up all take time, and rushing is how people skip safety steps. Allow an unhurried block of time, and do not start if you are tired, in the dark, or without all your tools and a place to take the used oil.
How much oil does my car need?
Your owner's manual lists the engine oil capacity for your exact engine, and it differs between engines even within one model. One maker's table shows 3.6 liters for one engine and 4.0 liters for others. Pour in slightly less than the listed amount, then check the dipstick and top up in small amounts. Our quarts guide explains where to find the figure and how to confirm it.
Can I change oil without a jack?
Sometimes. If the drain plug and filter are reachable from under the front bumper without lifting the car, you may only need to lay down a mat and reach in. Many cars sit too low for that. Never crawl under a car held only by a jack. If you must lift it, use rated jack stands or ramps on firm, level ground, following your manual's lifting instructions.
What do I do with used oil?
Let it cool, pour it into a leak-proof container, and take it to a collection site. EPA advises checking with local auto maintenance facilities, waste collectors and government waste officials for where and when you can drop off used oil. Do not dump it; EPA says used oil can pollute the environment if it is not recycled or disposed of properly. Drain and recycle the old filter as well, usually at the same place.
Why did my check engine light come on after an oil change?
A light that appears right after an oil change usually points to something disturbed during the job, such as a loose connector or a cap left off, rather than the oil itself. Check that the oil filler cap is tight and nothing is leaking or unplugged. If the light stays on or flashes, or the oil pressure light is lit, stop driving and have the car inspected.
Do I need to reset anything after an oil change?
Many cars have a maintenance reminder or oil-life indicator that does not reset itself, and your manual gives the reset steps for your model. Resetting it tells the car you changed the oil; it does not check that the job was done correctly. Write the date and mileage down yourself as well, so you have a record that does not depend on the dashboard.
Where we got this
- Kia Owner's Manual: Jacking instructions (ownersmanual.kia.com)
- Kia Owner's Manual: Recommended lubricants and capacities (ownersmanual.kia.com)
- EPA: Managing, Reusing, and Recycling Used Oil (epa.gov)
- SAE Mobilus: J300 Engine Oil Viscosity Classification (saemobilus.sae.org)
- API: Engine Oil (Engine Oil Quality Marks) (api.org)
- CDC: About Carbon Monoxide (cdc.gov)
- OSHA: Eye and Face Protection (osha.gov)
- U.S. DOE: Maintain Your Car (fueleconomy.gov) (fueleconomy.gov)
Further guides
- Car Maintenance Checklist: What to Check and When
A car maintenance checklist by system: what to check regularly, which jobs follow your manual's schedule, and which are safe for beginners to do.
- DIY Car Safety: The Rules Before You Touch Anything
DIY car safety rules for beginners: supporting the car, hot fluids, batteries, carbon monoxide, PPE, disposal, and when to stop and call a shop.
- Basic Tool Kit for Car Maintenance: What a Beginner Needs
A beginner's tool kit for car maintenance: start with the manual and a tire gauge, then sockets, a torque wrench, stands and safety gear. Skip the rest.
- How Many Quarts of Oil Does My Car Need?
How many quarts of oil your car takes is listed in the owner's manual for your exact engine. Where to find it, and how to fill and check the level.
- How Often to Change Oil: What the Manual Says and Why
How often to change oil depends on your owner's manual, your driving conditions and the oil used. See normal vs severe schedules and what to check.
- How Often to Change Synthetic Oil (and What Changes vs Conventional)
How often to change synthetic oil is set by your owner's manual, not the label on the bottle. See what the oil type changes and what it does not.