How to Replace Brake Pads: What the Job Involves and When to Call a Shop
Posted by DIYCar Editorial Team Reviewed by DIYCar Editorial Team Review date Posted Topic: Tires and brakes
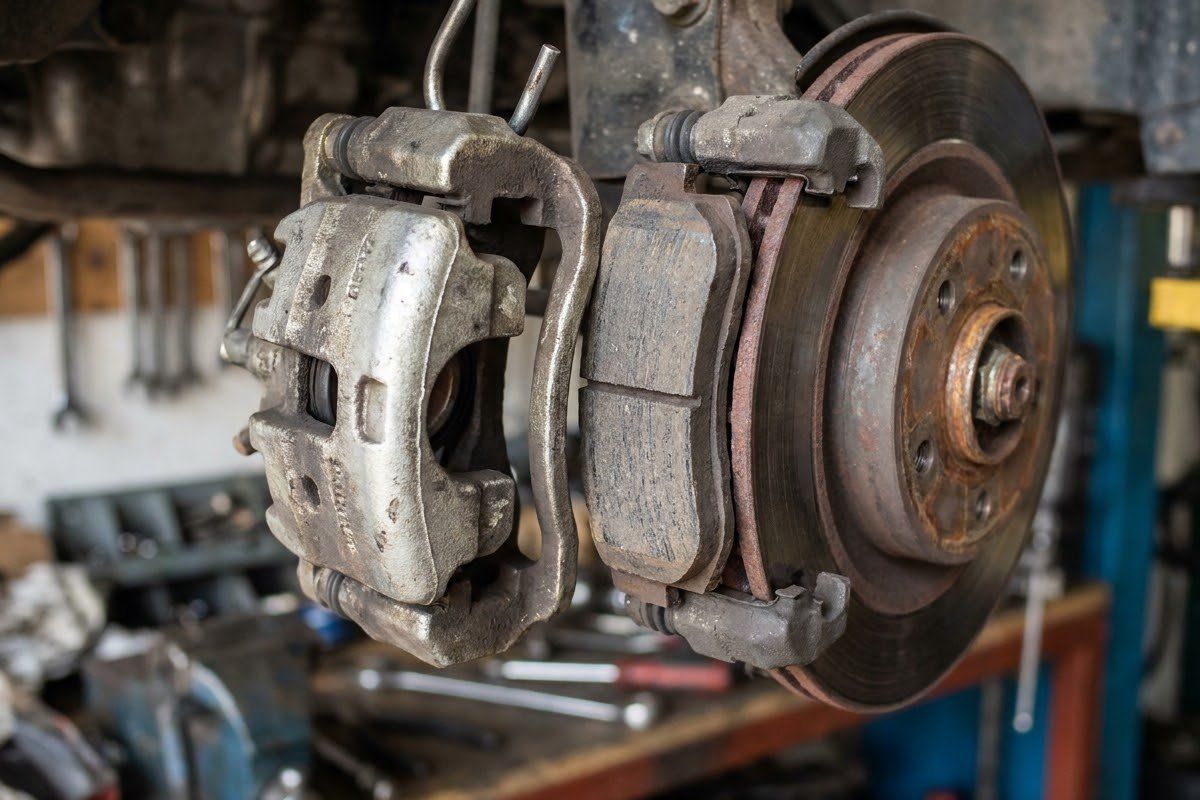
Replacing brake pads means supporting the car on jack stands, removing the wheel and caliper, fitting new pads and hardware, refitting the caliper to the torque in your manual, then bedding in the pads. Brakes can fail, so only do this with your manual's procedure, a torque wrench and a way to test at low speed. Otherwise have a shop do it.
Section of: Brake Pads Explained: Types, Wear Signs and When to Replace
Brakes can fail, and a mistake can hurt you or someone else. Read this page as a description of what the job involves and when to call a shop. Do the job only with the procedure from your owner’s manual or service information and a torque wrench. If you are not certain, have a shop do it. Wear levels and types are in the brake pads guide; to check pad wear first, see checking how worn the pads are.
Read this first
Do this job only if you have all of the following:
- the manual’s or service information’s procedure and torque values;
- jack stands rated for the vehicle, level hard ground and wheel chocks;
- a torque wrench and eye protection (OSHA’s construction eye-protection rule lists flying particles and liquid chemicals among the eye hazards);
- a way to test the brakes at low speed in a safe place before real driving;
- the willingness to stop and call a shop if anything is seized, damaged or unclear.
Read jack-stand and PPE rules and the jack safety guide. Never work under a car held only by a jack.
Do not do this if
- Your pedal is soft or sinks, the car pulls when braking, or you heard grinding: the system may have other faults. Have a shop diagnose it.
- Your car has an electric parking brake or brake-by-wire: shop only.
- Your manual calls for a scan tool or software procedure you do not have.
- A bolt, slide or caliper is seized or stripped.
- You cannot confirm the replacement pad is the one your manual or VIN specifies.
Tools and parts
Match the pad to your manual or VIN, not just to the make and model listing. Typical tools are jack stands, a torque wrench, sockets, a caliper support hook, a brush for rust, brake cleaner suitable for brake parts and the lubricant the pad maker specifies. Wagner says to replace the attaching hardware and apply high-temperature lubricants only to the contact points it lists.
Step-by-step overview
The sequence is the same on most disc brakes; the manual’s details override this list.
- Loosen the wheel’s lug nuts on the ground, lift and support the car on jack stands at the manual’s points, and remove the wheel.
- Look over the brake, noting how the pads and clips sit. Take photos.
- Remove the caliper following the manual and support it so it does not hang by the brake hose.
- Remove the old pads and hardware.
- Inspect the rotor against the manufacturer’s minimum thickness and run-out; Wagner says to replace a rotor that is outside the specification. Wash rotors to remove oils and fine particles.
- Remove rust from the bracket and guides and replace the hardware; lubricate the contact points Wagner lists with the correct lube.
- Compress the piston following the manual, then fit the new pads and refit the caliper.
- Torque the caliper bolts and lug nuts to the manual’s values.
- Pump the pedal until it is firm before moving the car, and check the fluid level.
Bed-in from the pad maker
Burnishing seats the friction material into the rotor and improves stopping performance and stability, says Wagner. Its shop procedure is about 20 complete stops from 30 mph, or 20 slow-downs from 50 mph to 20 mph, with light to moderate pedal pressure (for the slow-downs) and at least 30 seconds between applications, and no panic stops or high-speed stops. Follow the pad maker’s instructions that come with your pads, in a safe place, and avoid aggressive braking for the next couple of days.
Test at low speed and check pedal feel
Before driving on a road, test in a safe, empty area at walking speed. The pedal should be firm and the car should stop straight. Listen for rubbing, check that wheels turn freely and recheck the lug nut torque as the manual advises. If anything feels wrong, do not drive the car.
Signs it was not done right: stop and call a shop
- A soft, low or sinking pedal.
- Pulling to one side when braking.
- Grinding, scraping or a burning smell.
- A wheel that is hot or will not turn freely.
- A brake warning light, or fluid leaking around the wheel.
Do not drive the car. Have it towed to a shop.
Quick answers
How long does it take to replace brake pads?
We give no time because it depends on the car, your tools and how much corrosion you meet. Allow plenty of time and do not rush: the brakes must be reassembled and torqued correctly, tested at low speed and bedded in. Seized slides, stuck bolts or a stubborn piston are common reasons to stop and call a shop.
Do I need to replace the rotors?
Only if they fail the manufacturer's checks. Wagner says to inspect rotors for lateral run-out, parallelism and minimum thickness and to replace any that fall outside specification. Wagner also says to wash all rotors, new ones included, with soap, hot water and a scrub brush to remove oils and fine particles.
Do I need to bleed the brakes after replacing pads?
Your manual's pad procedure says whether bleeding is needed; do not open the hydraulic system unless it tells you to. Wagner's pad-check page says very dark brake fluid might need replacing. If the pedal is soft or sinks afterwards, do not drive the car; call a shop.
Should I replace pads on both sides of an axle?
Follow your manual's procedure, which says what to replace together, and ask a shop if you are unsure. The sources we opened do not state a rule about axle sets, so we make no claim beyond deferring to your manual.
Can I do this on an electric parking brake?
No, treat it as a shop job. Your manual may call for a service mode or a scan tool on these systems, and forcing parts can damage them. If your manual calls for software or a tool you do not have, stop and have a shop do the work.
What if the brakes feel different after I fit new pads?
New pads need bedding in, and Wagner says to avoid aggressive braking for a couple of days. But a soft or sinking pedal, pulling to one side, a grinding noise or a burning smell is not normal. Stop driving and have the brakes inspected before using the car again.
Where we got this
- Wagner Brake: Disc brake service (wagnerbrake.com)
- Wagner Brake: Disc pad break-in (wagnerbrake.com)
- Wagner Brake: How to check brake pads (wagnerbrake.com)
- OSHA: 29 CFR 1926.102, Eye and face protection (osha.gov)
Further guides
- Brake Pads Explained: Types, Wear Signs and When to Replace
What brake pads do, the wear signs to watch (squeal, grinding, thin pads), ceramic vs semi-metallic types and when to see a shop instead of DIY.
- How Often to Rotate Tires, and Why It Matters
How often to rotate tires: follow your owner's manual, with Michelin's 5,000 to 7,000 mile guide as a fallback. Patterns by drivetrain and exceptions.
- Brake Pad Thickness: How to Check It and the Minimum
Brake pad thickness: how to look through the wheel, what Wagner says about 1/4 inch and the wear slot, and why your car's own minimum counts.
- How to Rotate Tires at Home Safely
How to rotate tires at home: loosen lug nuts on the ground, lift and support the car on jack stands, swap by your pattern and torque to the manual's value.